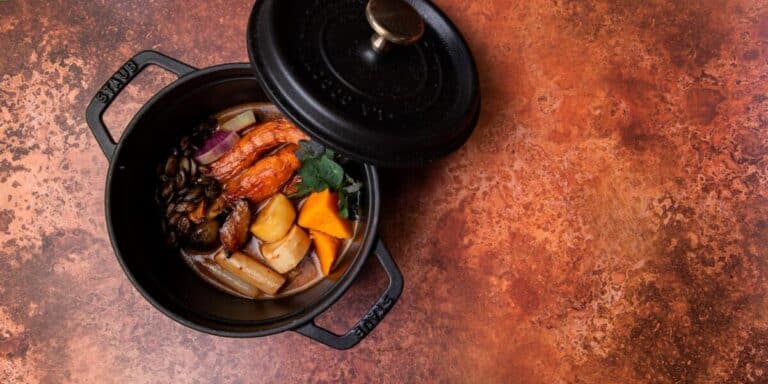
How to Cook a Perfect Tri Tip Roast?
You choose the perfect tri-tip, you season it with care, and you sear it with precision – but the true art of cooking a perfect tri-tip roast lies in the balance of these elements. You’ve likely tried various techniques, but still, the results may be inconsistent. To achieve a tender, juicy roast, it is crucial to understand the importance of each step, from selecting the right cut to slicing against the grain. The outcome hinges on these details, and getting them just right is what separates a good tri-tip from a truly exceptional one.
Key Takeaways
• Choose a well-marbled tri tip with a good balance of fat and lean meat for optimal flavor and tenderness.
• Season the tri tip with a dry rub of salt, pepper, and garlic powder, and let it sit for at least 30 minutes.
• Sear the tri tip in a hot skillet for 2-3 minutes on each side to develop a flavorful crust.
• Roast the tri tip in a preheated oven at 325°F (165°C) for 15-20 minutes per pound, or until it reaches the desired level of doneness.
• Let the tri tip rest for 10-15 minutes before slicing against the grain to ensure tender and flavorful meat.
Choose the Right Tri Tip
Your success in cooking a perfect tri tip roast begins with selecting a high-quality cut of meat, so it is essential to know what to look for when choosing the right tri tip. You’ll want to look for a tri tip that’s well-marbled, with a good balance of fat and lean meat. This will guarantee that the meat stays tender and juicy during cooking. Avoid tri tips that are too lean, as they can be prone to drying out.
When selecting a tri tip, you should also consider its size and shape. Opt for a roast that’s evenly shaped and about 1-2 pounds in weight. This size will allow for uniform cooking and make it easier to slice the meat thinly. If you’re cooking for a larger crowd, you can always choose a bigger tri tip, but keep in mind that it may take longer to cook.
Additionally, check the color and texture of the meat. A good tri tip should have a rich red color and a fine, smooth texture. Avoid meat with visible signs of aging or handling damage. Finally, make sure to choose a tri tip from a reputable butcher or store, as the quality of the meat can vary enormously depending on the source. By selecting a high-quality tri tip, you’ll be well on your way to cooking a perfect roast.
Season the Tri Tip Roast
Once you’ve selected a high-quality tri tip, it’s time to add some flavor with a blend of seasonings. You’ll want to create a dry rub that complements the natural taste of the beef. Start by mixing together a combination of salt, pepper, and garlic powder. You can also add other ingredients like paprika, dried thyme, and rosemary to give the tri tip a more complex flavor profile. Don’t be afraid to experiment and adjust the seasoning blend to your liking.
When applying the dry rub, make sure to coat the tri tip evenly. You can use your hands or a spatula to gently massage the seasonings into the meat. Pay particular attention to the areas with the most marbling, as these will benefit the most from the added flavor. Be generous with the seasoning, but avoid overdoing it, as this can overpower the natural taste of the beef.
After applying the dry rub, let the tri tip sit for at least 30 minutes to allow the seasonings to penetrate the meat. This will help the flavors meld together and intensify, resulting in a more flavorful roast. During this time, you can also let the tri tip come to room temperature, which will help it cook more evenly. By properly seasoning the tri tip, you’ll set the stage for a deliciously flavorful roast that’s sure to impress.
Sear the Tri Tip Properly
Now that the tri tip is seasoned and at room temperature, it’s time to develop a flavorful crust by searing it in a hot pan. You’ll want to use a skillet or Dutch oven that can withstand high heat, as this will help create a nice brown crust on the tri tip. Add a small amount of oil to the pan and let it heat up over high heat until it starts to smoke. Once the oil is hot, carefully place the tri tip in the pan, fat side down. You should hear a nice sizzle as the tri tip hits the pan.
Let the tri tip sear for 2-3 minutes on the first side, or until a nice brown crust forms. You may need to adjust the heat to prevent the crust from burning. Use tongs or a spatula to carefully flip the tri tip over and sear the other side for an additional 2 minutes. Make sure to get a good sear on all sides of the tri tip, as this will add flavor and texture to the finished dish. As you sear the tri tip, you’ll start to notice a nice aroma filling the air, which is a sign that you’re on the right track. By taking the time to properly sear the tri tip, you’ll be rewarded with a deliciously flavorful crust that complements the tender interior.
Finish With Oven Roasting
After searing the tri tip, transfer it to a preheated oven to finish cooking, which will help lock in the flavors and tenderize the meat. You’ll want to use a roasting pan or a Dutch oven with a rack to elevate the tri tip and allow air to circulate around it. This guarantees even cooking and prevents the meat from steaming instead of roasting.
Place the tri tip in the preheated oven, fat side up, and roast at 325°F (165°C). The low heat will help cook the meat evenly and prevent it from drying out. You can also add some aromatics like onions, carrots, and celery to the roasting pan, which will add flavor to the tri tip as it cooks.
As the tri tip roasts, the heat will help break down the connective tissues in the meat, making it tender and juicy. You’ll start to notice the aroma of the tri tip filling the kitchen, which is a sign that it’s cooking perfectly. Continue to roast the tri tip for about 15-20 minutes per pound, or until it reaches your desired level of doneness. Remember to let the tri tip rest for a few minutes before slicing and serving, which will help the juices redistribute and the meat to stay tender.
Use a Meat Thermometer
Using a meat thermometer is essential for achieving the perfect doneness, as it allows you to monitor the tri tip‘s internal temperature and avoid overcooking or undercooking the meat. You can’t rely on cooking time alone, as the size and thickness of the tri tip can vary. A thermometer takes the guesswork out of cooking and guarantees that your tri tip is cooked to a safe internal temperature.
When using a meat thermometer, insert the probe into the thickest part of the tri tip, avoiding any fat or bone. For medium-rare, the internal temperature should be around 130-135°F (54-57°C), while medium should be around 140-145°F (60-63°C). If you prefer your tri tip cooked to medium-well or well-done, aim for an internal temperature of 150-155°F (66-68°C) or 160-170°F (71-77°C), respectively.
It’s also important to note that the temperature of the tri tip will continue to rise after it’s removed from the heat source, a phenomenon known as ‘carryover cooking.’ So, it’s best to remove the tri tip from the oven when it reaches an internal temperature that’s 5-10°F (3-6°C) lower than your desired level of doneness. By using a meat thermometer, you’ll be able to achieve a perfectly cooked tri tip that’s juicy, tender, and full of flavor. This simple tool takes the guesswork out of cooking and verifies that your tri tip is cooked to perfection every time.
Let It Rest Before Slicing
Removing the tri tip from the oven, let it rest for 10-15 minutes before slicing to allow the juices to redistribute throughout the meat. You’ve worked hard to get that perfect sear and cook the tri tip to your desired level of doneness, and now it’s time to let it rest. This step is indispensable, as it allows the juices to redistribute, making the meat even more tender and flavorful.
During this time, the muscles in the meat relax, and the juices that have risen to the surface during cooking begin to redistribute throughout the meat. This makes the tri tip more tender and easier to slice.
Here’s a breakdown of what happens during the resting process:
| Time | What’s Happening | Why It’s Important |
|---|---|---|
| 0-2 minutes | Juices begin to redistribute | Prevents juices from spilling out when sliced |
| 2-5 minutes | Muscles relax, making meat tender | Easier to slice, more tender bite |
| 5-10 minutes | Juices continue to redistribute | Meat becomes more flavorful and moist |
| 10-12 minutes | Meat reaches peak tenderness | Best time to slice for maximum flavor and texture |
| 12-15 minutes | Meat starts to cool, but remains tender | Still a great time to slice, but be aware of cooling |
After letting the tri tip rest, you’ll be rewarded with a more tender, juicy, and flavorful piece of meat. It’s worth the wait, so be patient and let the tri tip rest before slicing!
Slice Against the Grain
Now that you’ve let your tri tip rest, it’s time to slice it, and to get the most tender results, you’ll want to slice against the grain. Slicing against the grain means cutting the meat in a direction perpendicular to the lines of muscle fibers. This will make the meat more tender and easier to chew. To identify the grain, look for the lines of muscle fibers on the surface of the meat. You can also use your finger to feel the direction of the fibers.
Once you’ve identified the grain, place the tri tip on a cutting board and slice it in the opposite direction. Use a sharp knife to make even, thin slices. Apply gentle pressure, and let the knife do the work. Don’t press down too hard, as this can cause the meat to tear. If you’re having trouble slicing, try using a serrated knife or a meat slicer. Slice the tri tip into thin strips, about 1/4 inch thick. You can slice it into smaller pieces or leave it in larger strips, depending on your preference.
Slicing against the grain will make a big difference in the tenderness and flavor of your tri tip. It’s a simple step that’s often overlooked, but it’s indispensable for achieving that perfect, tender bite. So take your time, and slice carefully – your taste buds will thank you! By slicing against the grain, you’ll be able to enjoy your tri tip at its best.
Frequently Asked Questions
Can Tri Tip Roast Be Cooked in a Slow Cooker?
"Verily, good sir or madam, thou seekest to know if tri tip roast can be cooked in a slow cooker? Indeed, you can! Simply season the roast, sear it, and then cook it low and slow for 8-10 hours, and voila!"
How Do I Store Leftover Tri Tip Roast?
You can store leftover tri tip roast by letting it cool completely, then refrigerating it in a sealed container for up to three days or freezing it for up to two months, keeping it fresh for future meals.
Can I Cook a Frozen Tri Tip Roast Directly?
You’re wondering if you can cook a frozen tri tip roast directly, and you’re not alone. You can, but you shouldn’t; instead, thaw it first to guarantee even cooking and a tender finish.
Is It Necessary to Tie a Tri Tip Roast Before Cooking?
You don’t necessarily need to tie a tri tip roast before cooking, but doing so helps it cook more evenly and prevents it from spreading out too much, which can lead to overcooking the edges.
Can I Cook a Tri Tip Roast on a Gas Grill?
"Don’t worry, you won’t sacrifice flavor by grilling a tri tip on a gas grill! You can achieve a perfect sear and tender interior by cooking it over medium-high heat, about 5-7 minutes per side, depending on the thickness."