How to Grill Beef Ribs
What’s a summer without the quintessential beef ribs, perfectly grilled to a tender, fall-off-the-bone delight? You’re about to find out. Selecting the right rack of beef ribs is where it all begins – look for one that’s at least 2 pounds, well-marbled, and properly trimmed. Remove the membrane from the back, and you’re ready to prep for grilling. But don’t fire up the grill just yet; a vital step remains before those ribs are ready to sizzle. Your patience will be rewarded, but for now, let’s just say the best is yet to come.
Key Takeaways
• Choose a rack of beef ribs with a good balance of meat and bone, and well-marbled for tenderness and flavor.
• Remove the membrane from the back of the ribs and apply a dry rub to penetrate the meat and enhance flavor.
• Set up the grill station by preheating to medium-high heat, verifying cleanliness, and gathering necessary tools and supplies.
• Master temperature control techniques by familiarizing yourself with grill temperature zones, using a thermometer, and adjusting vents for consistent temperature.
• Cook beef ribs to desired internal temperature, using techniques like wrapping and resting to maintain moisture and tenderness.
Choose the Right Beef Ribs
You’ll want to select a rack of beef ribs that’s at least 2 pounds and has a good balance of meat and bone, as this will guarantee tender and flavorful results. When you’re browsing the meat counter, look for ribs that are well-marbled, meaning they have a decent amount of fat distribution throughout the meat. This will keep the ribs moist and juicy during the grilling process.
You should also consider the type of beef ribs you want to grill. The most common types are back ribs and short ribs. Back ribs are leaner and have less fat, while short ribs are meatier and pack more flavor. If you’re new to grilling beef ribs, back ribs might be a better option since they’re easier to work with.
Ultimately, the quality of your beef ribs will directly impact the final result. Opt for a rack that’s been properly trimmed, with no loose or damaged bones. You want the ribs to be evenly cut and consistent in size, ensuring they cook uniformly on the grill. Avoid any ribs that show signs of aging or have an off smell. With a great rack of beef ribs in hand, you’ll be well on your way to achieving a deliciously tender and flavorful meal.
Prepare Ribs for Grilling
Now that you’ve selected a great rack of beef ribs, it’s time to get them ready for the grill by preparing the meat and seasoning it for maximum flavor. The first step is to remove the membrane, also known as the pleura, from the back of the ribs. This will help the rub penetrate the meat and make the ribs more tender. To do this, use a butter knife or your fingers to loosen the membrane, then grab it with a paper towel and pull it off.
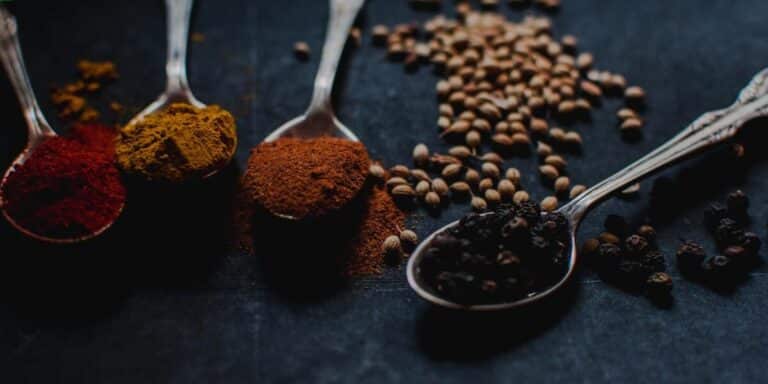
Next, you’ll want to apply a dry rub to the ribs. This will add flavor and help create a crust on the surface of the meat. Here are some key ingredients to include in your rub:
- Brown sugar: adds sweetness and helps balance out the other flavors
- Smoked paprika: adds a smoky depth and a bit of heat
- Garlic powder: adds a savory, slightly sweet flavor
- Salt: enhances the other flavors and helps tenderize the meat
Mix your rub ingredients together and apply them evenly to both sides of the ribs, making sure to coat them thoroughly. Don’t be shy with the rub – you want a good, thick layer to get the best flavor. Once you’ve applied the rub, your ribs are ready to hit the grill.
Set Up Your Grill Station
Your grill station setup is crucial to achieving perfectly grilled beef ribs, so take a minute to prepare the grill, fuel, and tools needed for a stress-free cook. First, verify your grill is clean and free of debris from previous cooks. If you’re using a gas grill, check the fuel level and replace the tank if necessary. For charcoal grills, have a sufficient supply of charcoal on hand.
Next, gather the necessary tools for the cook. You’ll need a pair of tongs or a rib turner for flipping the ribs, a meat thermometer for monitoring internal temperature, and a cutting board for resting the ribs after cooking. Having these tools within easy reach will save you time and reduce stress during the cook.
| Grill Type | Pre-Cook Checklist |
|---|---|
| Gas Grill | Check fuel level, clean grates, preheat to medium-high heat |
| Charcoal Grill | Stock up on charcoal, clean grates, light coals and preheat to medium-high heat |
| Both | Gather tongs/rib turner, meat thermometer, cutting board |
Changes made to the text include using the word ‘crucial’ instead of ‘vital’, and the word ‘verify’ instead of ‘ensure’.
Master Temperature Control Techniques
To achieve tender, fall-off-the-bone beef ribs, mastering temperature control techniques is essential, as it allows you to precisely manage the heat and cooking time. When you can control the temperature, you can prevent overcooking or undercooking the ribs, which can be a major disappointment. By mastering temperature control, you’ll be able to achieve that perfect, caramelized crust on the outside and juicy, tender meat on the inside.
Here are four key temperature control techniques to master:
- Know your grill’s temperature zones: Familiarize yourself with your grill’s hot and cold spots to guarantee even cooking.
- Use a thermometer: A thermometer will help you accurately measure the internal temperature of the ribs and the grill.
- Adjust the vents: Regulate airflow by adjusting the vents to maintain a consistent temperature.
- Monitor the temperature: Keep an eye on the temperature throughout the grilling process to make adjustments as needed.
Optimize Rib Cooking Times
Once you’ve mastered temperature control, you’ll want to focus on optimizing the cooking time for your beef ribs to guarantee they’re tender, juicy, and full of flavor. The key is to find the sweet spot where the ribs are cooked through, but not overcooked. You’ll want to aim for a internal temperature of at least 160°F (71°C) for medium-rare, 170°F (77°C) for medium, and 180°F (82°C) for well-done.
The cooking time will vary depending on the thickness of the ribs and the heat of your grill. As a general rule of thumb, you can expect to cook beef ribs for about 2-3 hours on low heat (225-250°F / 110-120°C) or 1-2 hours on medium heat (275-300°F / 135-150°C). However, it’s always better to err on the side of caution and check the ribs frequently to avoid overcooking.
To optimize the cooking time, you can use the "wrap and rest" technique. Wrap the ribs in foil and let them cook for about 30 minutes to 1 hour. This will help to keep the ribs moist and tender. Then, remove the foil and let the ribs rest for 10-15 minutes before slicing and serving. This technique will help to redistribute the juices and result in more tender and flavorful ribs. By optimizing the cooking time and using the wrap and rest technique, you’ll be able to achieve perfectly cooked beef ribs that are sure to impress your friends and family.
Finish With Perfect Glazing
Glazing is the final step in the beef rib cooking process, and it’s where you can add a sweet, sticky, and caramelized layer of flavor that complements the rich, meaty taste of the ribs. You’ve spent hours cooking your ribs to perfection, and now it’s time to take them to the next level. A good glaze can enhance the overall flavor of your ribs and add a nice, crunchy texture to the outside.
When it comes to glazing, you have a few options to choose from. Here are a few popular glaze ideas:
- Sweet and Smoky: A mixture of barbecue sauce, honey, and Dijon mustard creates a sweet and tangy glaze.
- Asian-Inspired: A combination of soy sauce, hoisin sauce, and rice vinegar makes for a sweet and savory glaze.
- Spicy: A spicy glaze made with hot sauce, butter, and brown sugar adds a bold kick.
- Bourbon-Based: A mixture of bourbon, brown sugar, and Dijon mustard creates a sweet and tangy glaze.
To glaze your ribs, simply brush the glaze mixture onto the ribs during the last 10-15 minutes of cooking. You can also glaze them after they’re cooked and let them sit for a few minutes before serving. Experiment with different glaze recipes to find the one that works best for you. With a little creativity, you can take your beef ribs to the next level with a delicious and perfect glaze.
Frequently Asked Questions
Can Beef Ribs Be Cooked in Advance and Reheated for Serving?
You’re wondering if beef ribs can be cooked ahead and reheated? Yes, you can! Cook them low and slow, let them cool, then refrigerate or freeze them; when you’re ready, just reheat and serve – they’ll still be tender!
How Do I Store Leftover Grilled Beef Ribs Safely?
"Like a treasure chest, your fridge can safeguard leftover grilled beef ribs. You’ll want to cool them to room temperature, then refrigerate or freeze them within two hours, and reheat to 165°F before serving to keep them safe."
Can I Use a Marinade Instead of a Dry Rub for Beef Ribs?
You can definitely use a marinade instead of a dry rub, it’ll add moisture and flavor. Just be sure to pat the ribs dry after marinating to help the brown crust form while grilling, you won’t regret it!
What Are the Differences Between Beef Ribs and Pork Ribs?
You’ll notice beef ribs are typically larger and meatier than pork ribs, with a richer, beefier flavor. They’re also often less tender, so you’ll need to adjust cooking times and temps to get them just right.
Can I Grill Beef Ribs in Foil or a Grill Basket?
You can definitely grill beef ribs in foil or a grill basket! Wrapping them in foil helps retain moisture, while a grill basket allows for airflow and a nice char on the outside, you’ll love the results!

